

Performance cap tear strength matters when a lightweight shell is cut, perforated, folded, stitched, packed, and repeatedly handled. A fabric can feel strong during a simple pull yet allow a small nick to grow beside a laser hole, seam allowance, back opening, or visor edge. That difference can turn an approved sample into a weak production detail.
Brand owners and sourcing teams can control the risk by naming the material, tear method, test direction, specimen count, result format, acceptance rule, and bulk release point. Those decisions belong in the sourcing brief for a custom performance cap before cutting patterns and ventilation layouts are approved.
Why tear strength belongs in a cap specification
Performance caps often use thin woven fabrics to reduce weight and dry quickly. The same style may include laser-cut ventilation, an embroidered or bonded logo, a rear opening, a curved seam, and a tightly folded edge. Each operation changes how a local cut or damaged yarn may carry load.
Tear strength describes resistance to the growth of an existing tear under a stated test. It cannot predict every field failure, though it gives buyers a repeatable way to compare candidate fabrics and production lots. The result is most useful when the tested fabric matches the approved article, finish, color route, and orientation.
| Observed issue | Likely starting point | Buyer response |
|---|---|---|
| Split beside a ventilation hole | Cut edge, tight hole pitch, or low local yarn support | Review the hole layout and test the intended panel |
| Rip from a back opening | Sharp corner, handling load, or narrow edge allowance | Inspect the pattern shape and reinforcement |
| Tear beside a logo | Needle damage, heat history, backing edge, or stiff transfer | Test the decorated panel with production settings |
| Damage during sewing | Needle choice, feed pressure, cut edge, or operator handling | Separate material weakness from process damage |
| One color performs differently | Dyeing, finishing, coating, or heat treatment variation | Review color groups and lot traceability |
Tear, tensile, seam, and puncture results are different
A tear method follows how a prepared cut propagates through a specimen. A tensile method pulls an uncut specimen and records behavior under that setup. A seam test examines a sewn joint and may end through thread breakage, fabric rupture, seam slippage, or another defined condition. Puncture testing applies a concentrated load through the material.
These results answer different purchasing questions. A strong tensile result cannot stand in for tear resistance, and a passing shell tear result cannot replace a sewn-joint assessment. Buyers should review the separate performance cap seam strength guide when seam construction, stitch type, or seam allowance is part of the concern.
Test reports are comparable only when the method, edition, specimen direction, conditioning, equipment, calculation, and reporting rule align. A bare number copied from a supplier sheet has little decision value without that context.
Choose one tear method and record its edition
ISO 13937-2 from 2000 covers a single-tear method using trouser-shaped specimens. The official ISO record states that the publication was reviewed and confirmed in 2023. ISO 13937-4 from 2000 covers a double-tear method using tongue-shaped specimens and carries the same 2023 confirmation.
The two methods use different specimen forms and loading behavior, so their results should remain tied to their own procedures. A laboratory can help determine which method suits the woven shell, coated construction, stretch fabric, or other material under review. The request should name the agreed edition instead of using a broad phrase such as standard tear test.
| Method choice | What the buyer records | Comparison limit |
|---|---|---|
| Trouser-shaped single tear | ISO 13937-2 edition, direction, specimen count, and result rule | Compare only with results produced under the same agreed setup |
| Tongue-shaped double tear | ISO 13937-4 edition, direction, specimen count, and result rule | Keep separate from single-tear and pendulum results |
| Another method requested by the brand | Full designation, edition, scope, conditioning, and reporting details | Confirm applicability with the laboratory before setting a limit |
| Finished-panel trial | Panel pattern, perforation, logo process, seams, and pull location | Treat as product evidence rather than a substitute for a standard fabric method |
A standard provides a procedure. It does not provide one universal pass value for every running, golf, or outdoor cap. The brand sets an acceptance rule from product use, material construction, historical evidence, approved samples, and the consequences of failure.
Map the test plan to cap tear risk zones
Start with a flat fabric test to compare material options. Then inspect the finished pattern for places where a cut, hole, corner, fold, or decoration can concentrate stress. Mark those locations on the drawing and retain clear photos with the approval record.
Laser-cut panels need special attention. Hole diameter, pitch, row direction, edge quality, distance from a seam, and fabric stretch direction work together. The laser-cut perforation buyer guide explains how to document the pattern and acceptable cut edges.
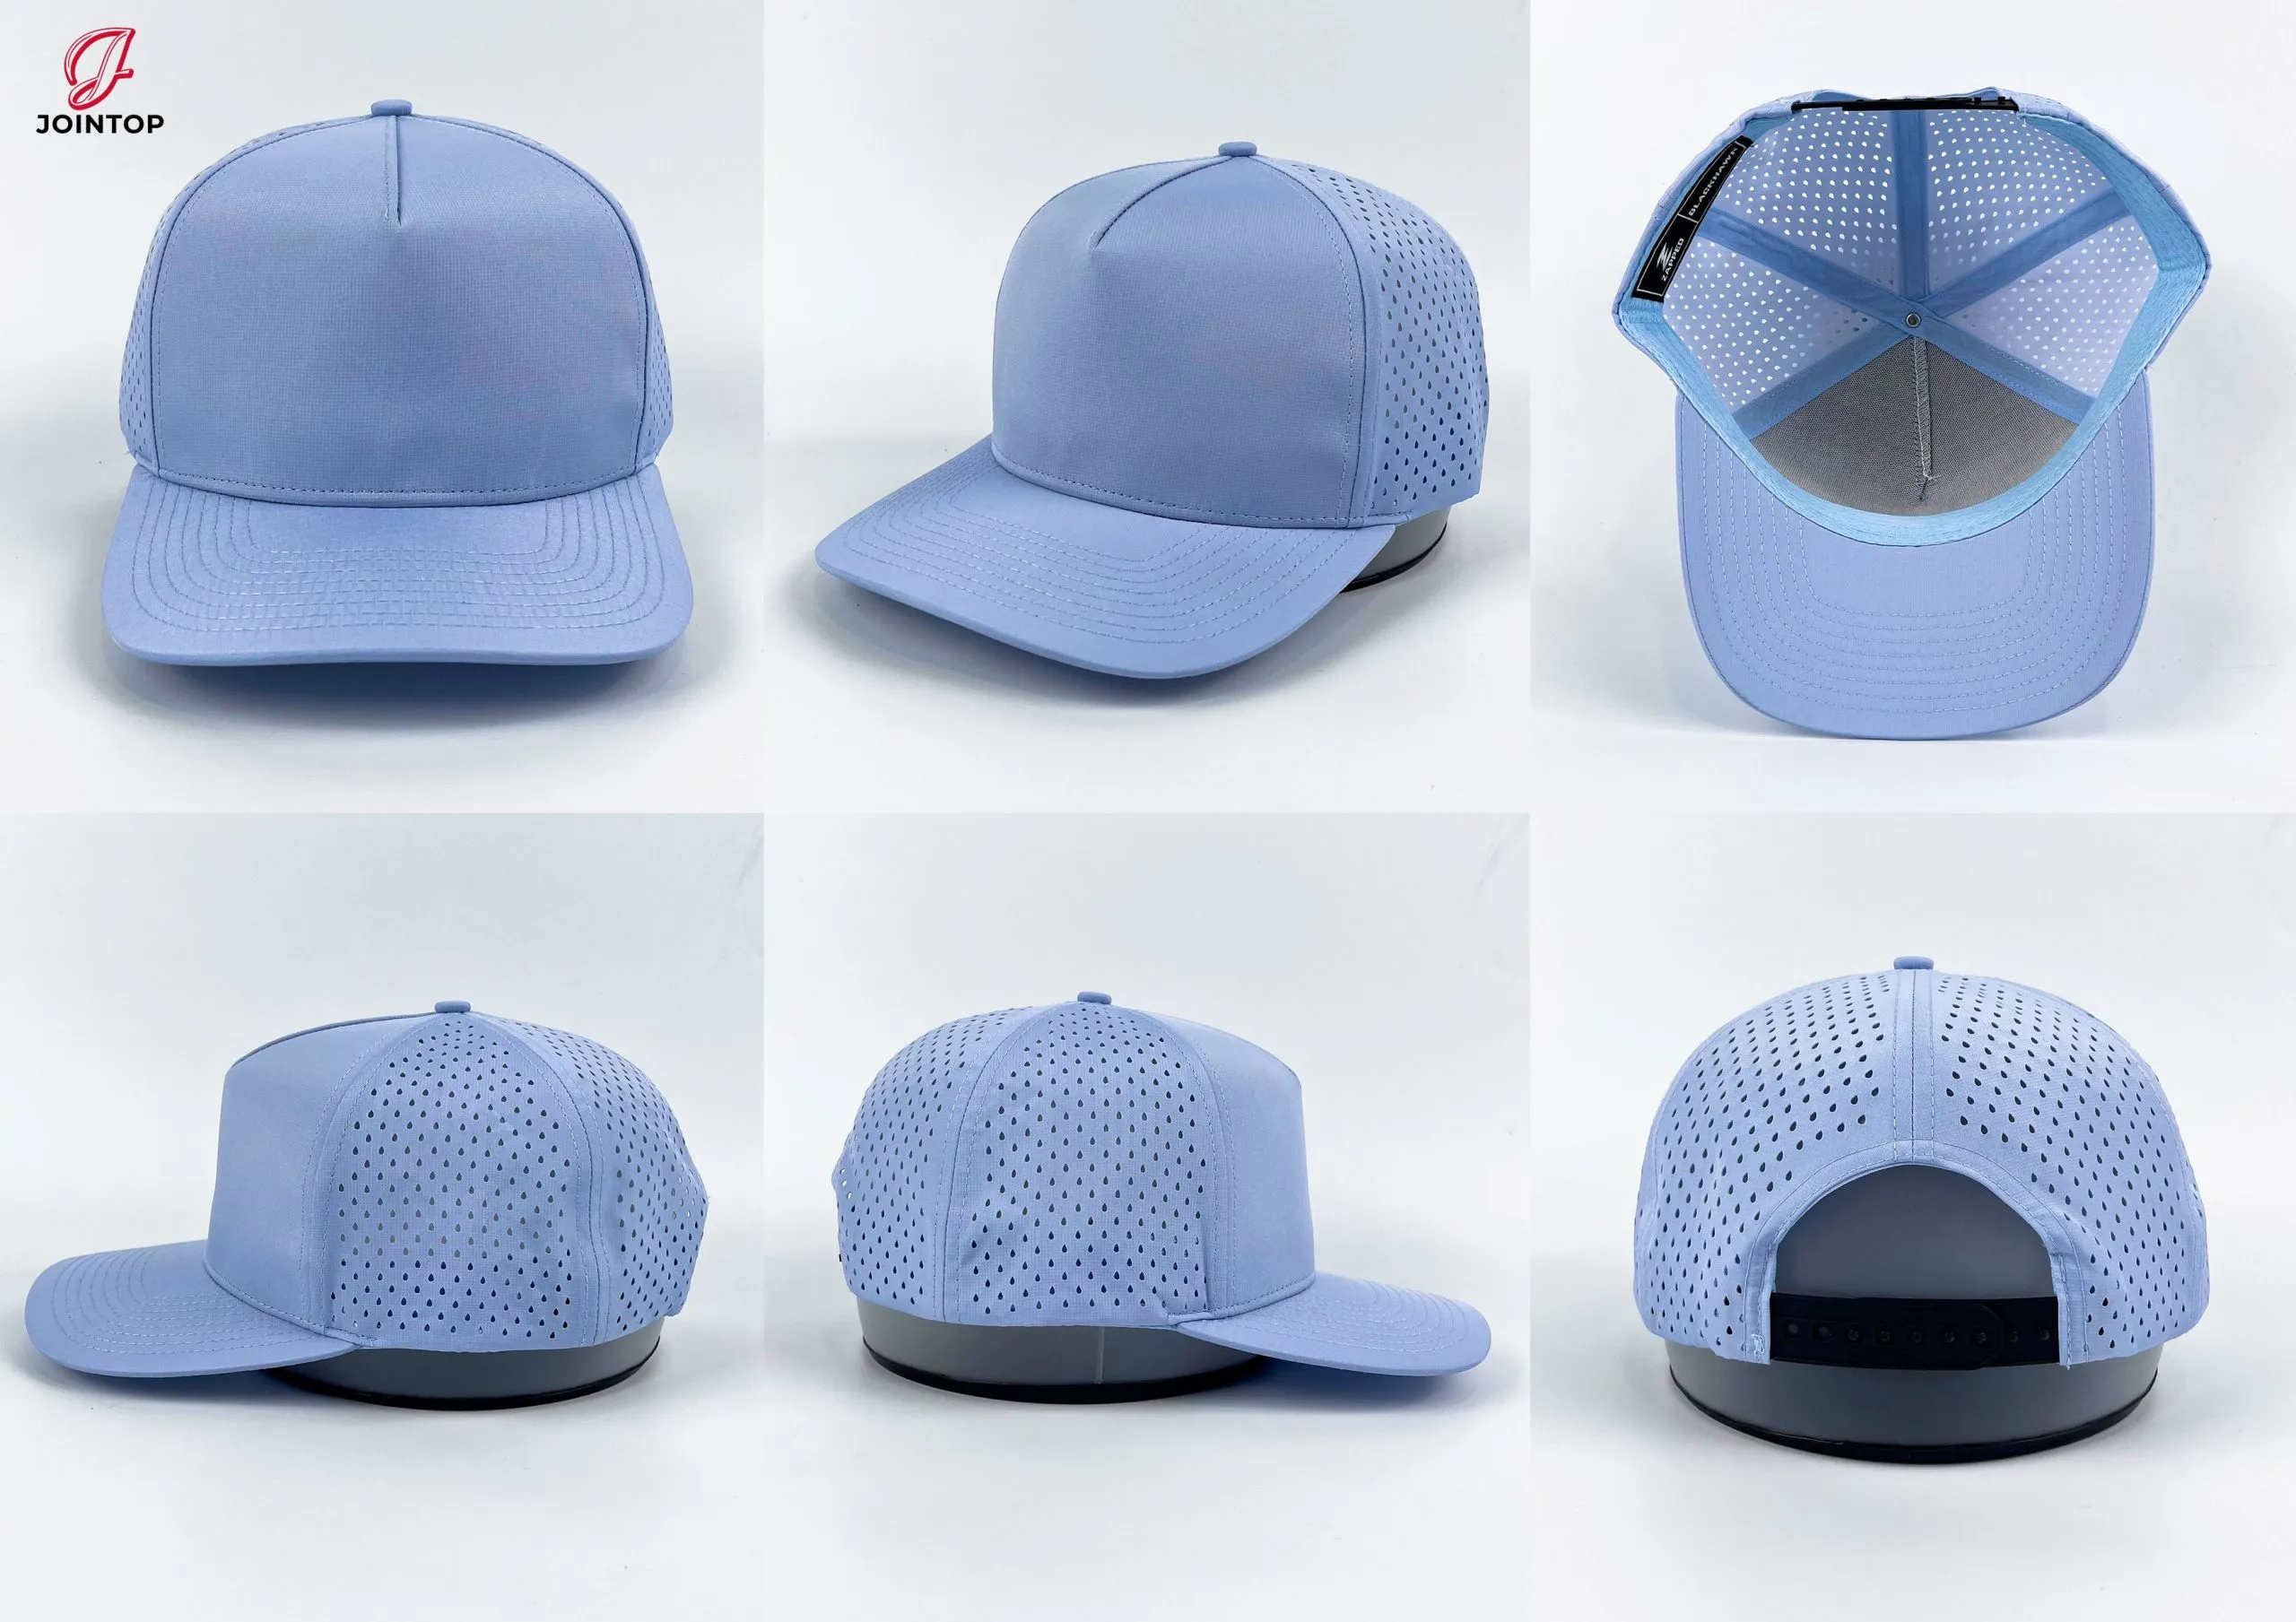
Other risk zones include the back opening corners, the lower crown above the sweatband, the visor attachment line, side-panel seams, and the boundary of a stiff logo application. A rounded opening and a reinforced edge may behave differently from a sharp corner cut into the same material.
Write a usable tear strength requirement
A purchase specification should identify the material and the decision controlled by the result. Avoid a requirement that says tear strength passed. It leaves the method, direction, acceptance value, specimen identity, and lot response open to interpretation.
| Specification field | Decision to record | Evidence to retain |
|---|---|---|
| Material identity | Supplier article, fiber content, construction, finish, color, and lot | Approved swatch and traceable material record |
| Test method | Full designation, edition, specimen shape, and direction | Laboratory request and complete report |
| Sampling | Specimen count, roll or lot coverage, and conditioning | Sampling record and specimen labels |
| Acceptance rule | Minimum result, calculation rule, and treatment of abnormal tears | Signed limit linked to the approved sample |
| Panel review | Perforation, logo, opening, seam, and edge locations | Dated photographs and retained panels |
| Failed-lot action | Hold, retest, replace, redesign, or written concession route | Disposition record and approval history |
Add the fields to the performance cap tech pack or its quality appendix. The report number should trace to the approved supplier article and bulk lot. Keep the unit and direction beside each result so values cannot be separated from their meaning.
Set acceptance rules from product risk
Begin with representative material options tested under one agreed method. Compare the results with handling trials and finished-cap review. A light racing cap with dense perforation may need a different risk decision from a heavier golf cap that uses broad solid panels.
Directions matter because woven materials can resist tear differently along each fabric axis. Record how the specimen is cut, how the result is named, and how the cap panels sit on the fabric. A single average can hide a weak direction that aligns with a back opening or ventilation row.
Decoration should be treated as a material and process combination. Needle penetration, stitch density, backing, heat, pressure, adhesive, and logo edge stiffness can affect local behavior. Approve the base material first, then review a decorated panel made with production settings.
Build the development and approval plan
Screen swatches before making several complete samples. Once the material shortlist is clear, test the intended color and finish. Then build panels with production-representative cutting, perforation, fusing, decoration, and sewing. Keep retained references from each approved stage.
| Stage | Sample | Question answered | Release decision |
|---|---|---|---|
| Material screening | Candidate shell swatches | Which options meet the agreed tear requirement | Select fabrics for development |
| Process trial | Cut, perforated, or decorated panels | Whether production operations create weak starting points | Adjust the process or release the panel setup |
| Development sample | Complete cap in the intended construction | Where the pattern and assembly concentrate handling load | Revise or approve the style |
| Pre-production sample | Cap made from released bulk materials | Whether the approved setup moved into production | Authorize cutting or hold the lot |
| Bulk verification | Defined specimens from identified lots | Whether received material matches the release evidence | Release, investigate, or replace |
The signed sample should carry the same material code, color, finish, hole pattern, logo method, and construction listed in the test record. The sample approval checklist helps keep comments and physical references together.

Diagnose weak tear results before changing the cap
A low or inconsistent result may come from yarn type, weave density, stretch construction, ripstop spacing, coating, lamination, dyeing, finishing, or heat exposure. It can also come from specimen direction, gripping, conditioning, a wrong method selection, or an incomplete report.
Review raw results rather than the summary line alone. Check the sample description, method edition, laboratory, issue date, specimen count, conditioning, individual readings, calculation, units, tear direction, and any discarded result. Photographs can help explain whether the tear followed a straight yarn path, transferred direction, or behaved irregularly.
Change one controlled variable at a time where practical. If fabric, finish, hole pitch, logo process, and seam allowance all change together, the next trial will give little evidence about the actual correction. Record each revision and keep failed pieces for comparison.
Carry the approved result into bulk production
Incoming control should confirm supplier article, color, finish, width, mass, and lot against the released record. The fabric weight and thickness guide explains why those physical checks help catch a material substitution or process shift before cutting.
Where tear testing is a release condition, define who may approve the report and when cutting can start. Isolate a failed lot while the team checks identity, sampling, method, and production impact. A written concession should name the affected quantity, reason, risk review, and approving parties.
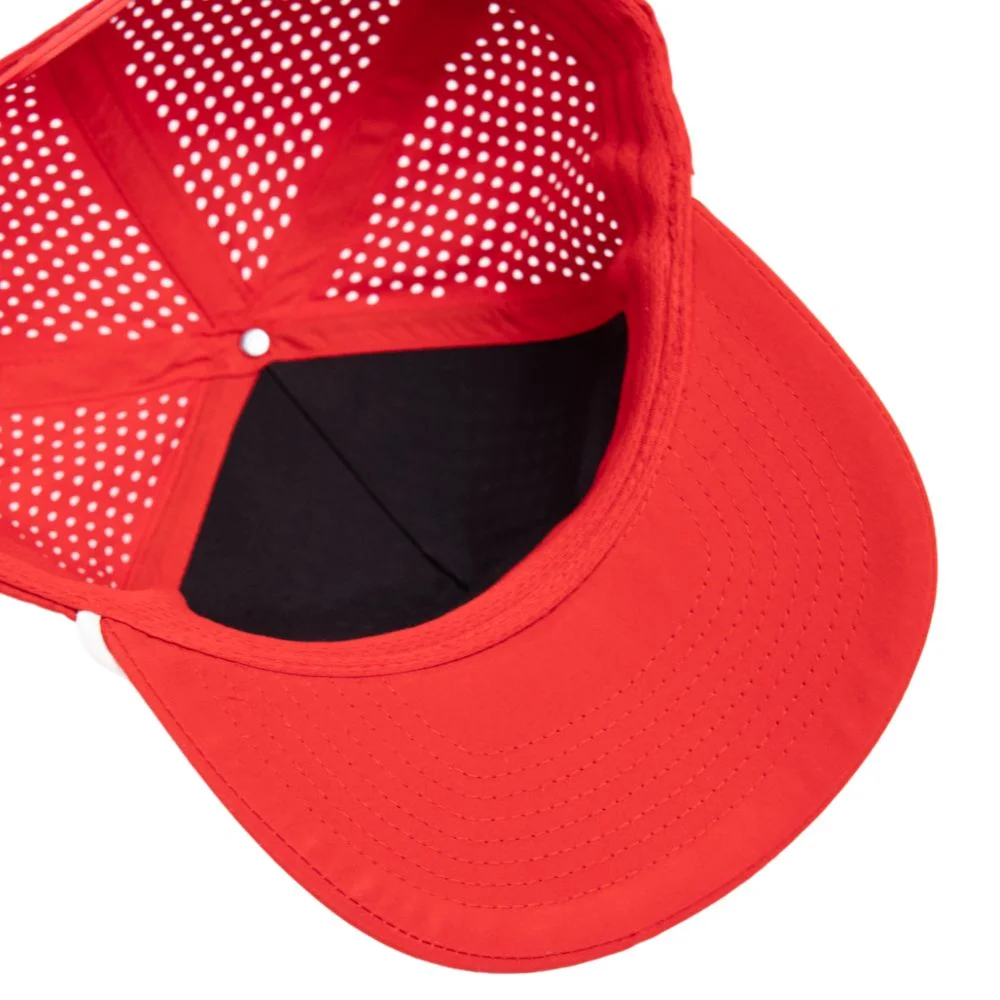
During sewing, inspect cut edges, back opening corners, perforation fields, logo boundaries, and any panel stretched over a curved seam. Final inspection should compare bulk caps with the signed sample and record defect location and quantity. This process fits the wider sample-to-bulk quality control plan and the documented cap production process.
Use a clear purchase decision before order release
Confirm the shell article, finish, color coverage, agreed method, edition, directions, specimen count, acceptance rule, panel trials, and bulk frequency. Check that the laser pattern, logo process, seam allowance, opening shape, and reinforcement match the tested sample.
Ask who will receive the report, who can release material, and what happens after a failed result. The purchase order should point to the approved specification and sample rather than a general durability claim. This turns tear strength into a traceable buying decision.
If a supplier proposes another fabric or finish, repeat the defined comparison before approval. Similar fiber content and fabric weight do not establish equal tear behavior because yarn, construction, processing, and coating may differ.
Frequently asked questions
Is tear strength the same as tensile strength?
No. Tear testing follows the propagation of a prepared tear under a stated method. Tensile testing pulls an uncut specimen under another setup. The reports answer different material questions and should remain separately identified.
Can a seam strength result replace a fabric tear result?
No. A seam result reflects the fabric, thread, stitch, seam type, seam allowance, and failure mode of a sewn joint. A tear result focuses on tear growth in the material specimen defined by its method. Many performance caps need both reviews.
Should laser-perforated panels be tested separately?
Yes when the holes create a meaningful local risk. First compare the base fabric with the agreed standard method. Then review production-representative panels for hole size, pitch, edge quality, direction, seam clearance, and handling damage.
Can one report cover every color?
Only when the brand's risk review supports the grouping. Dyeing, finishing, coating, and heat history may vary by color. Separate testing can be appropriate when routes differ or earlier results show a material change.
When should bulk material be verified?
Set the point before the purchase order is released. Risk-sensitive programs may require lot evidence before cutting. Stable programs may use a documented periodic plan. The specification should name frequency, sample identity, release authority, and the response to failure.
What should a buyer send for a tear strength review?
Send the intended activity, shell article, construction, finish, color range, panel orientation, ventilation layout, logo method, known risk zones, sample count, existing reports, and proposed acceptance rule. Include a reference cap when the opening shape, perforation, or panel layout guides the decision.
If you are preparing an RFQ, contact JoinTop with your brand or website, cap style, quantity per style and color, vector logo file, target market, destination, required delivery date, planned fabric, ventilation layout, and tear concerns. Use the inquiry form at the bottom of the page so the team can review material screening, sample evidence, and bulk control needs.




 EN
EN  ES
ES  FR
FR  AR
AR  JA
JA  KO
KO  RU
RU  DE
DE  PT
PT  IT
IT  TR
TR